Search This Blog

Showing posts with label promarkers. Show all posts

Friday, 25 July 2014

DIY Promarker storage box...

For the past year or so I've been storing my set of promarkers, grouped in to colour combinations and held together with elastic bands in a draw at my crafting station. But I like neat and orderly and easy to find so while trawling through Pinterest I found the perfect DIY solution using an egg crate lighting grid and a plastic storage box with a lid.

Now if you are from the USA you probably know what an egg crate lighting grid is but I'm from the UK and didn't have the foggiest idea! So more trawling and googling later I found an alternative grid in the UK it's a pond filter grid and can be found on eBay for about £7.50 including delivery. I also found a 9L really use box box that would hold all my promarkers with spare slots to accommodate future purchases.
I used my dremel versa-tip heat tool while has 6 different attachments, one of which was the perfect size to slice the plastic grid to cut it down to fit.
I then used tie wraps to secure the top grid in place through the holes I'd made using my versa-tip tool.


I spent a peaceful afternoon in the sun colouring mini sticky dots and sticking them to the relevant promarker pen.


links to some of the products I used...


Sunday, 20 April 2014

Keep calm and drink tea 3D box card...

I was so pleased with the effect of the 3D box card I made using my silhouette cameo I decided to make another one. This time however I used some of my precoloured (to see how to do this please watch Els YouTube video) Elizabeth craft designs sparkly teacups and teapot that have been shouting out to me to be used. To finish it off I added a Karen Burniston Katie label and stamped it with keep calm and drink tea.


links to some of the products I used...


Friday, 18 April 2014

Clear fancy accordion books and shoes quote card...

Hi all, this acetate card was inspired by one I saw on Karen Burniston's blog recently.


I had a little bit of a glue crisis and the design team ladies from Karens challenge blog really helped.
They advised me to stick my card stock to some wide double sided tape before running it through the big shot with the flourish edging die. Thanks guys:)
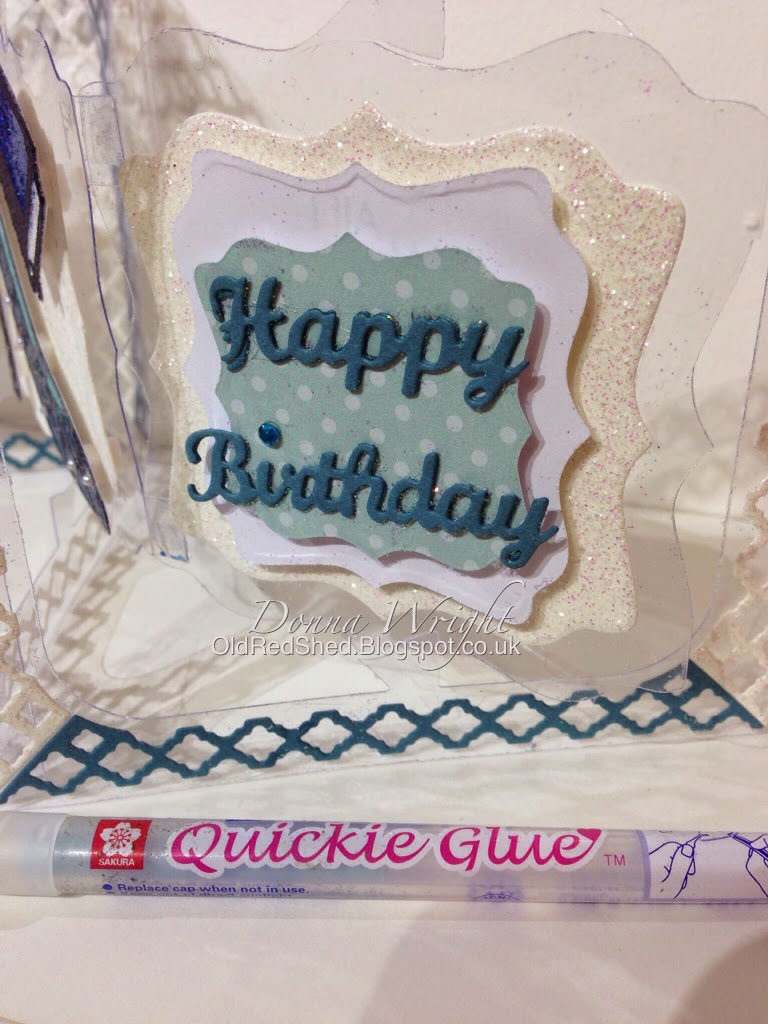
The other part of my glue crisis was that I used a clear runny glue to stick the happy birthday on but because I'd been using glitter, the words became 'gunked' up with glitter. :(. The words dies I use can be found on Elizabeth craft designs online store if you click on any of the first three pictures links belong it will take you there.

So that this card was not relegated to the rubbish pile I simply cut out another happy birthday and stuck it over the top of the original words using a quickie glue pen.

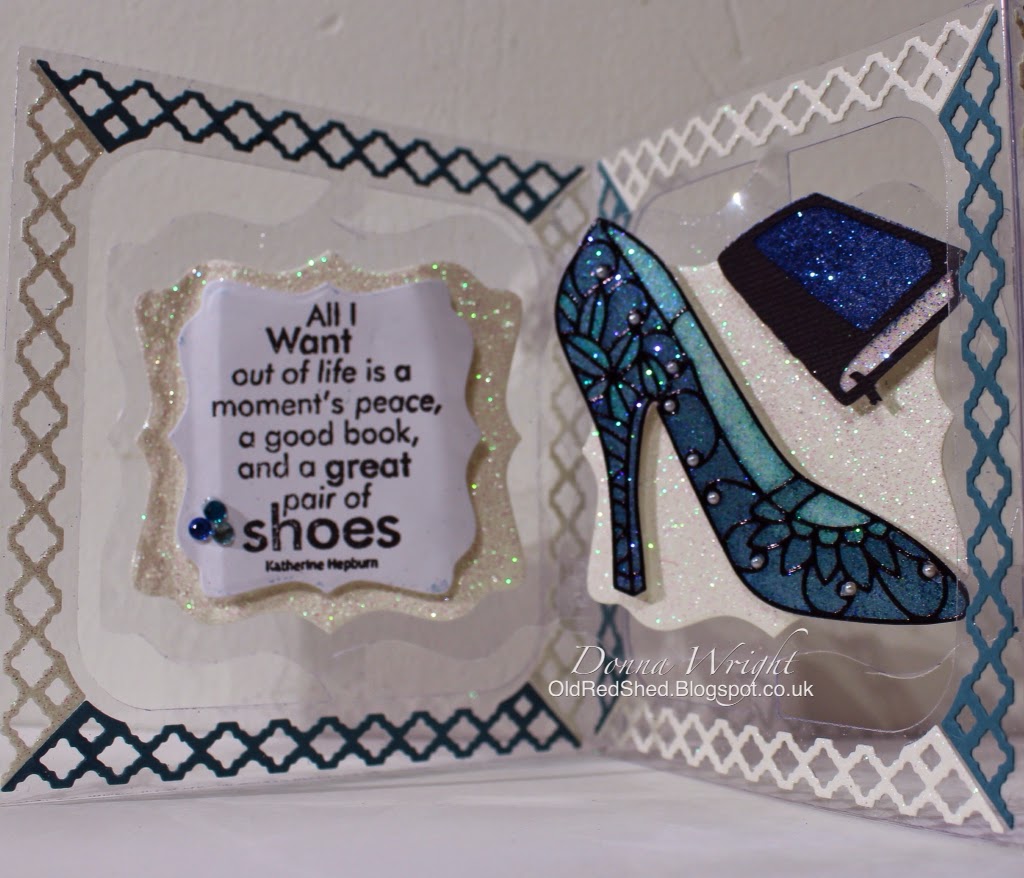
I found trying to capture the sparkliness of the shoes on this card very hard especially as I seemed to be playing cat and mouse with the sun this week, but I finally managed it today:). To achieves the sparkliness I copies Els YouTube video in which she shows you how to the use double sided adhesive and microfine glitter that can be bought from Elizabeth craft designs online store. ( If you click on the links belong they will take you there.). I then coloured the shoe using my letraset promarkers.


Links to some of the products I used...

Tuesday, 15 April 2014

Karen Burniston April design challenge...

This months design challenge was a Mamas and Babies theme. The briefing was to use Pop it Ups to celebrate Mom for Mother's Day OR make a Baby card. I made a Mother's Day card yesterday and today I chose to make a baby card.

I used Karens Katie label die for this card with one of her agatha edges die.

The sweet sentiment stamp was one of my bargains I bought for half price from the local garden centres closing down sale.

The babygrow is a freebie stamp from the front of a magazine from about a year ago. I coloured it using my letraset promarkers and used a cute little baby pink peg to secure it in place.

Thanks for stopping by to look at my card, don't forget to check out the other designer challenge cards on Elizabeth craft design blog on Thursday.

Links to some of the products I used...


Tuesday, 11 March 2014

Lot of pops Daffodils card...

Hi everyone, here is the second post for Karen Burniston's March designer challenge which was to use any of the Pop it Ups dies for any Spring or Easter themed project. This time I thought I would make a card with a very spring-like Daffodil theme. Daffodils are my favourite flower, forget roses, I'd rather receive a lovely bunch of Daffs. The hello and friend dies are from Elizabeth craft designs

For the yellow part of Daffodil head I used Karen's Sizzix movers and shapers magnetic star die. The orange part of the head was created using Karen's sizzlits flower die, and the stem was made using my favourite die of all time, the flag pole decorative strip die.

This is how I made the yellow part of the flower head...

1. I stuck some double sided adhesive to the back of my yellow paper before running it through my Sizzix bigshot with the star die.


2. I then stuck the two star pieces to some plain white paper and cut the excess white paper away with a pair of scissors

3. Next I used a tracing wheel and a ruler to makedotted lines as shown. This is to make creasing the star into a 3D shape easier.

4. I used a fiskar eyelet punch to make a hole in the centre of star for the brad to fit through later.

5. The last thing to do was to crease the star along the dotted lines as shown.

The orange flute part of the daffodil was a little more fiddly and I did find different way to make them after I'd finished!! I posted the link to the different way here, but this is how I did mine...

Firstly I applied some more of my double sided adhesive sheets to the back of my paper, Amy tangerines 'ready, set, go' paper from American crafts. I then cut out the flowers using Karens sizzlits flower die and punched a hole in the centre.


I then peeled the back off the flowers and used tweezers to place them in the micro fine glitter pot. I dusted as much as I could off the flower then rubbed the glitter into the sticky side to make sure that when I coloured the glittery side with my promarkers they didn't get too covered in glitter.


I then coloured the glittery side with Amber and bright orange promarkers.


This was the most fiddly part of the whole process, I temporarily attached the flower to the top of a stickles bottle using an elastic band. I then carefully applied some clear glue to the flower making sure not to get glue on the elastic band or the bottle and left it like that until it was completely dry.

The stalks weren't as tricky, as the flagpole die did the job for me, (the adjoining leaves were easily cut by hand). All I had to do was punch a hole in one end and cut them to the correct length before securing all three pieces together with a yellow brad. I also used a grass die from Karens all seasons die set. Ta dah!!

 
The 'meet me in the sunshine' sentiment was along the edge of the Amy tangerine 12 x12 paper pad attached to the camera paper makes a personal addition to this seasonal card. I added the green stitching by running my tracing wheel along a ruler to mark the card before using a fine tip promarker to accentuate the line.
 

links to some of the products I used: